Effortless Video Processing: How to Use a Rust-Powered GUI for FFmpeg
Introduction
FFmpeg is a legendary multimedia tool—a true Swiss Army knife for audio and video files. Behind its raw power lies a steep learning curve: the command line. Typing complex arguments, remembering obscure flags, and debugging errors can frustrate even seasoned users. A new breed of front-end applications solves this by wrapping FFmpeg in an intuitive graphical interface. One standout is built with Rust, offering speed, safety, and a modern user experience. This guide walks you through setting up and using such a Rust-based GUI for FFmpeg—so you can harness FFmpeg’s capabilities without memorizing a single command.
What You Need
Before you start, gather the following tools and knowledge:
- A computer running Windows, macOS, or Linux – the GUI works on all major platforms.
- Rust toolchain (minimum version 1.60) – required to compile the front-end program.
- FFmpeg installed – the GUI interacts with FFmpeg’s binaries, so you need the
ffmpegcommand available in your system’s PATH. - Basic familiarity with your terminal or command prompt – you’ll run a few commands for installation.
- Patience and curiosity – the first build may download many dependencies, but the result is worth it.
Step-by-Step Guide
Step 1: Install Rust
If you don’t already have Rust, get it via rustup, the official installer. Open your terminal and run:
curl --proto '=https' --tlsv1.2 -sSf https://sh.rustup.rs | shFollow the on‑screen instructions. After installation, restart your terminal or source your profile to add Rust to your PATH. Verify with:
rustc --versionYou should see output like rustc 1.72.0 or later.
Step 2: Install FFmpeg
The GUI relies on the FFmpeg binary. Install it via your system’s package manager:
- macOS:
brew install ffmpeg - Ubuntu/Debian:
sudo apt install ffmpeg - Windows: Download from ffmpeg.org and add the
binfolder to your PATH.
Test that FFmpeg is accessible:
ffmpeg -versionStep 3: Clone the Rust GUI Repository
Find a popular Rust FFmpeg GUI project. For example, search GitHub for rust ffmpeg gui and pick one with good stars and documentation. Clone it:
git clone https://github.com/example/ffmpeg-gui-rust.git
cd ffmpeg-gui-rust
Replace the URL with the actual project you choose.
Step 4: Build the Project
Inside the cloned directory, compile the program with Cargo:
cargo build --releaseThis step downloads dependencies and compiles them. It may take several minutes the first time. Once finished, the executable appears in target/release/.
Step 5: Launch the GUI
Run the program from the project root:
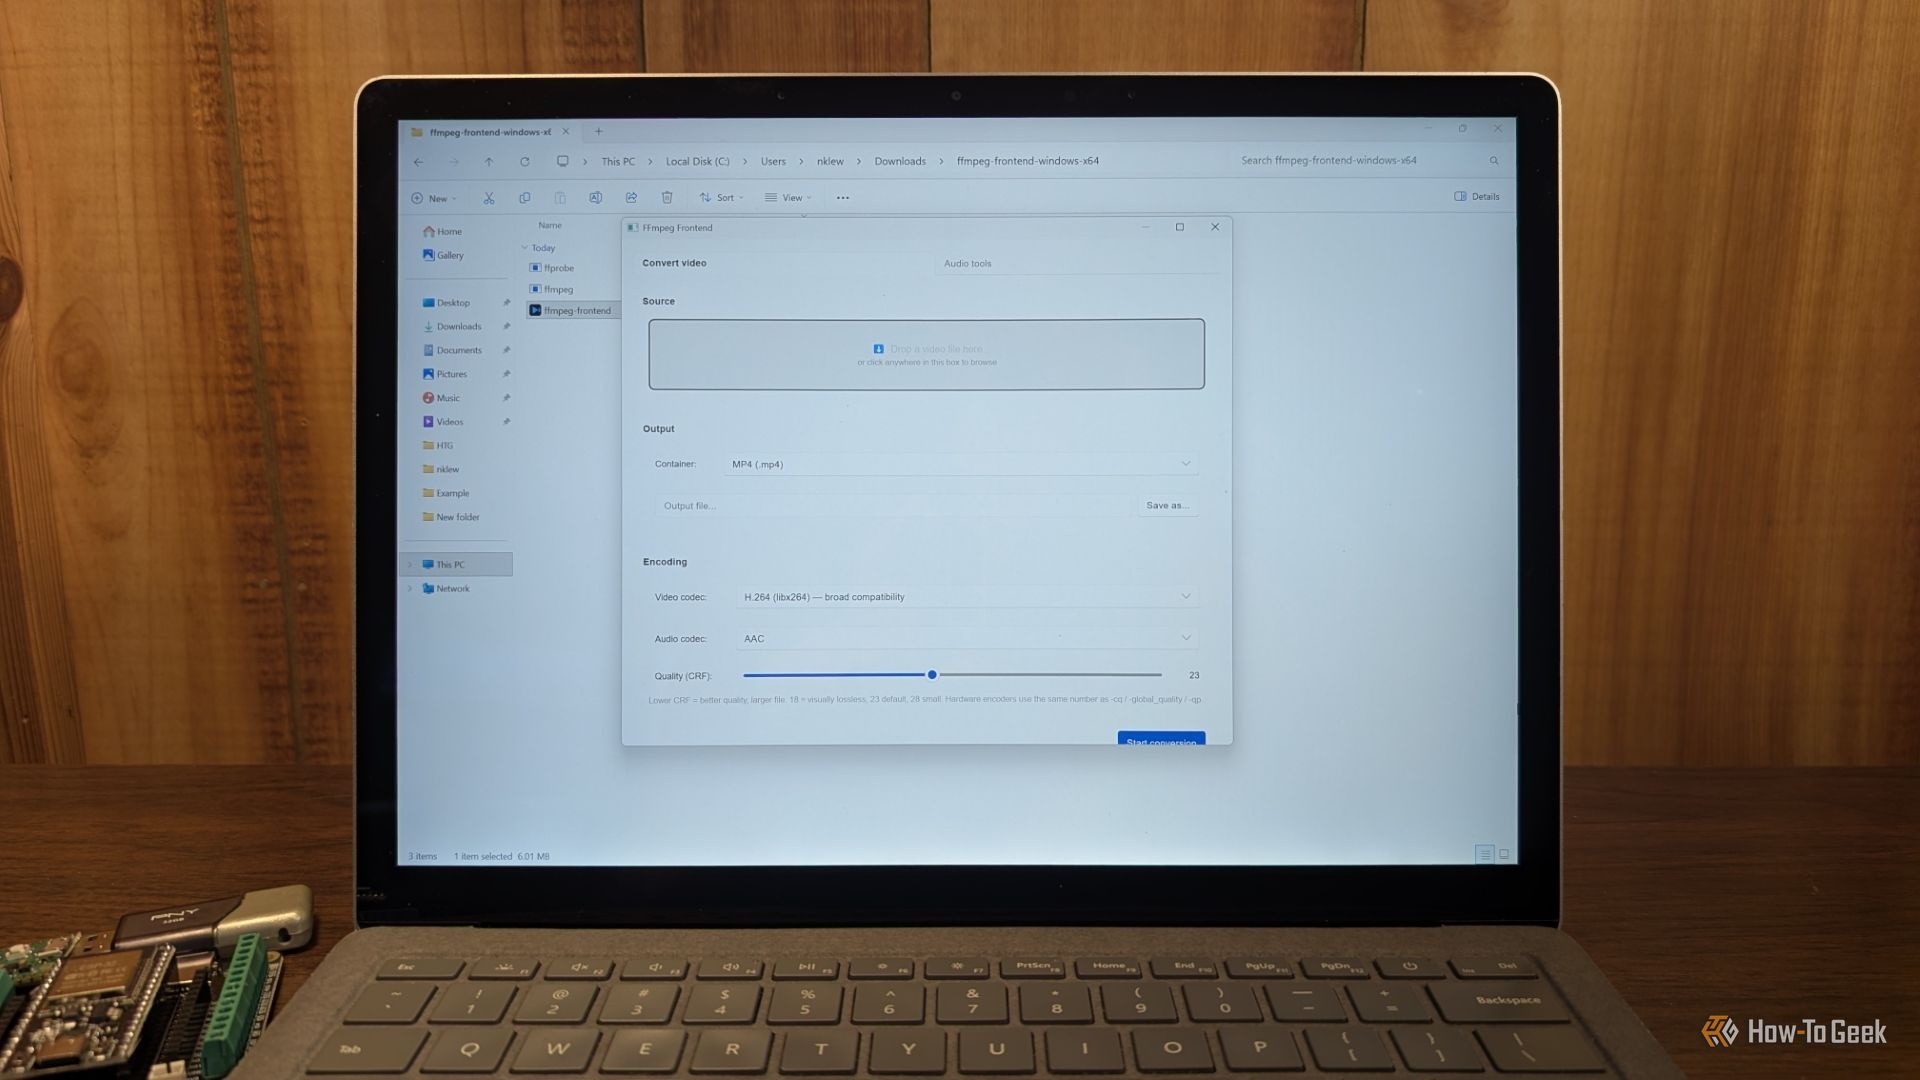
./target/release/ffmpeg-gui(On Windows, use target\release\ffmpeg-gui.exe.) The interface should appear—a clean window with basic controls like “Select Input,” “Output Format,” and “Start Conversion.”
Step 6: Perform Your First Task
Let’s convert a video from MP4 to AVI:
- Click “Select Input” and choose your MP4 file.
- From the “Output Format” dropdown, pick AVI.
- Optionally adjust quality or codec settings (the GUI often provides presets like “High Quality” or “Fast Encoding”).
- Click “Convert” or “Start”. The progress bar shows FFmpeg’s work. When done, the output file appears in the same folder as the input (unless you specified otherwise).
Congratulations—you just used FFmpeg without typing a single command!

Step 7: Explore Advanced Features
Most Rust GUIs offer more than basic conversion. Common features include:
- Trim video: Set start and end times via sliders or input fields.
- Merge files: Add multiple inputs and set the output format.
- Extract audio: Choose “Audio Only” and specify format like MP3 or WAV.
- Batch processing: Drag multiple files and convert all at once.
- Custom FFmpeg flags: An advanced option allows you to enter raw arguments for maximum flexibility.
Browse the GUI’s menus—you’ll discover the power of FFmpeg wrapped in a friendly interface.
Step 8: Troubleshoot Common Issues
If something goes wrong, check the following:
- FFmpeg not found: Make sure the binary is in your PATH. Restart the GUI after adding it.
- Build errors: Ensure you have the latest Rust stable version (
rustup update stable). Also check that you have required system libraries (likelibx265-devon Linux for codec support). - GUI freezes: Some operations are heavy; wait for the progress bar. If unresponsive, check the terminal output for FFmpeg logs.
Tips & Best Practices
- Keep FFmpeg updated – New versions add codecs and fix bugs. The GUI uses whatever FFmpeg you have installed.
- Use presets – Experiment with built-in presets before tweaking individual settings. They often provide good quality/speed trade‑offs.
- Batch smartly – When processing many files, close other heavy applications to avoid resource contention.
- Check the output format – Some containers (e.g., MKV) are more flexible than MP4. If you encounter errors, try a different container.
- Shortcuts save time – Many GUIs support keyboard shortcuts: Ctrl+O to open a file, Ctrl+S to start conversion. Look for a shortcut list in the Help menu.
- Remember the CLI isn’t gone – The GUI is a wrapper; if you need a very specific FFmpeg feature not exposed in the interface, you can always fall back to the command line. But with a good Rust GUI, you might not need to.
The Rust-powered FFmpeg frontend transforms a powerful but unfriendly tool into an accessible visual application. You retain all of FFmpeg’s capabilities while gaining a modern, fast, and safe interface. Now go ahead—process your media without a terminal window in sight.
Related Articles
- 6 Key Insights from the Latest in AI-Assisted Programming
- Anthropic Scoops Up Stainless in Bid to Dominate Developer Tooling for AI Agents
- Boosting Go Performance with Stack-Allocated Slices
- Python 3.15 Alpha 5 Released Following Build Error; JIT Gains and New Profiler Steal the Show
- Semble: Intelligent Code Search That Slashes Token Usage by 98%
- The Unseen Risks of Enterprise Vibe Coding: Why AI Governance Can't Keep Up
- From QDOS to GitHub: Building Your Own DOS from 45-Year-Old Source Code
- Navigating the Evolution of Programming: A Practical Guide to Legacy Systems, Modern Practices, and Community Tools